- Matching
- Pattern ①【Sending bulk emails】 Sending Job emails to candidates
- Pattern ②【Sending individual emails】 Sending job email to a candidate
- Pattern ③ Perform 【Add Process in bulk】
- Pattern ④ Perform 【Add process individually】
Matching
On Porters, matching can be done from both candidate page and job page.
If you wish to find matching jobs for a certain candidate, first of all identify the candidate data and display it on the list view.
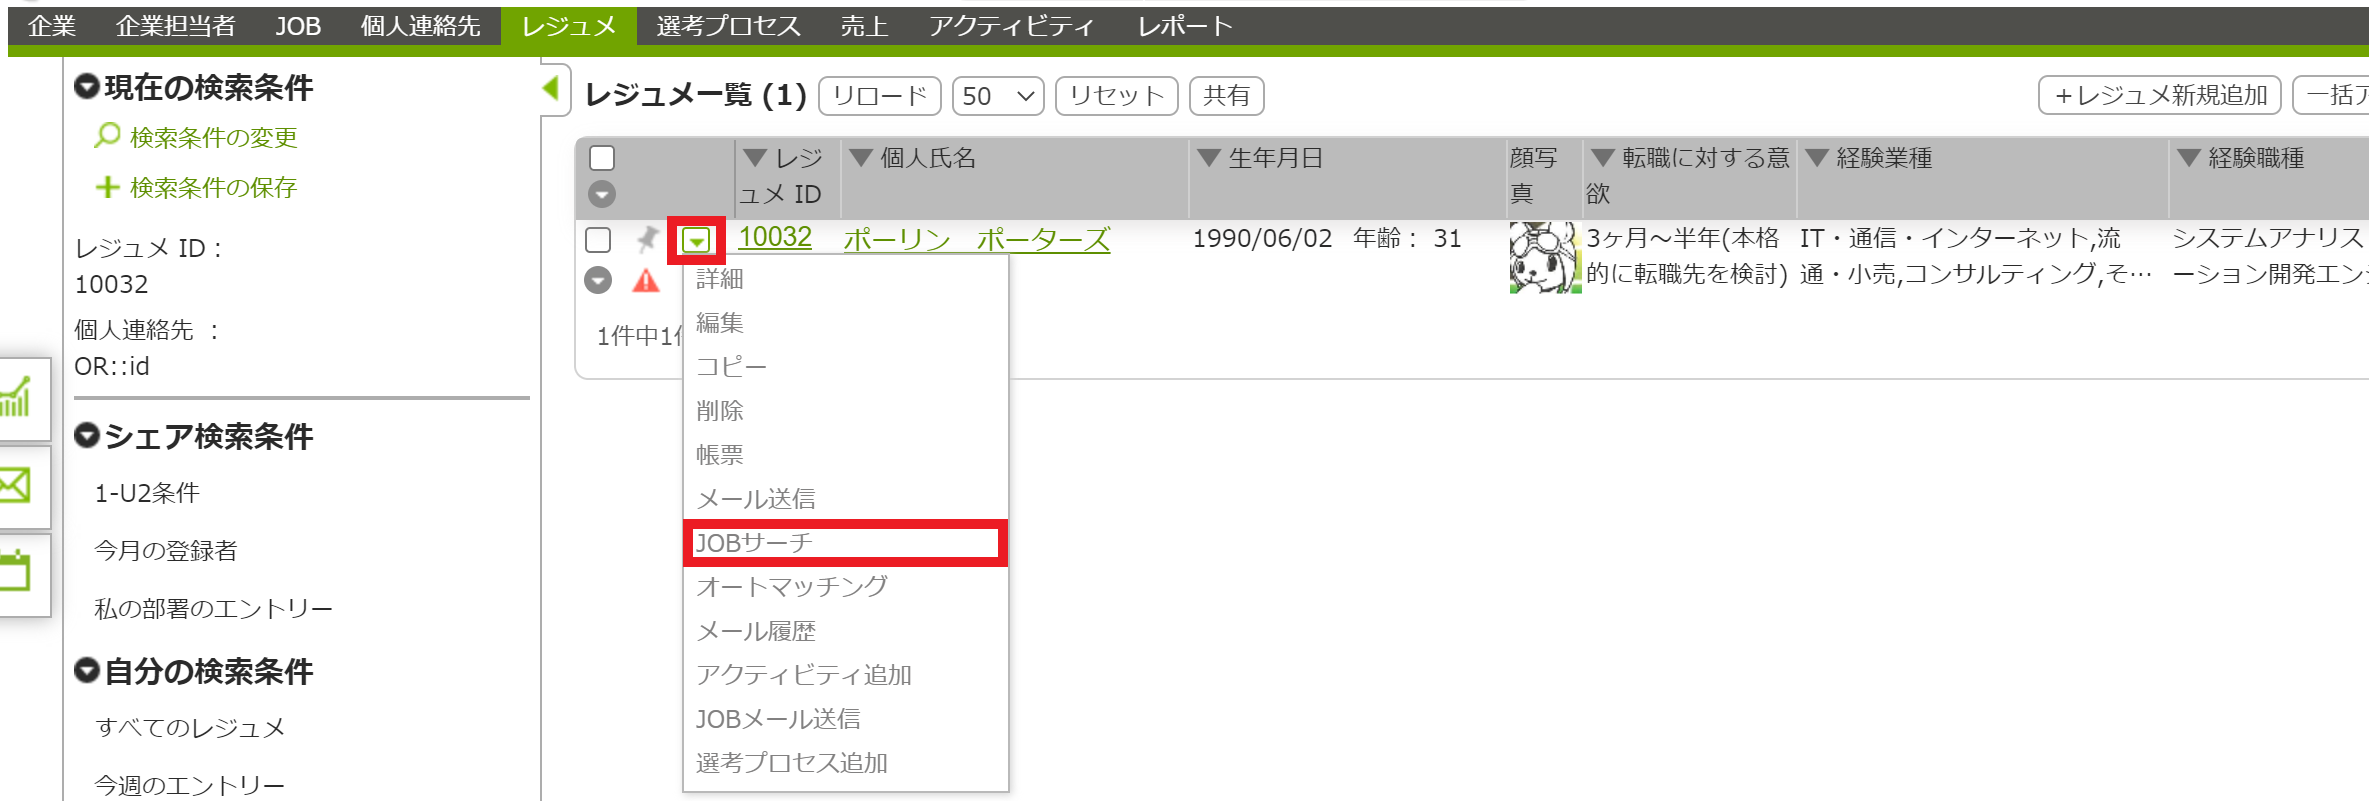
Click on "JOB Search/Matching" in the Action menu "▼" button.
左The JOB search screen will open on the left and the quick view of resumes will open on the right. Enter the necessary criteria while viewing the job seeker's information and search.
You can also click "+Save Search Criteria" to save the search criteria as individual matching criteria for the resumes shown in the Quick View.
The individual matching criteria will be added to the bottom of the Action menu of the saved resume.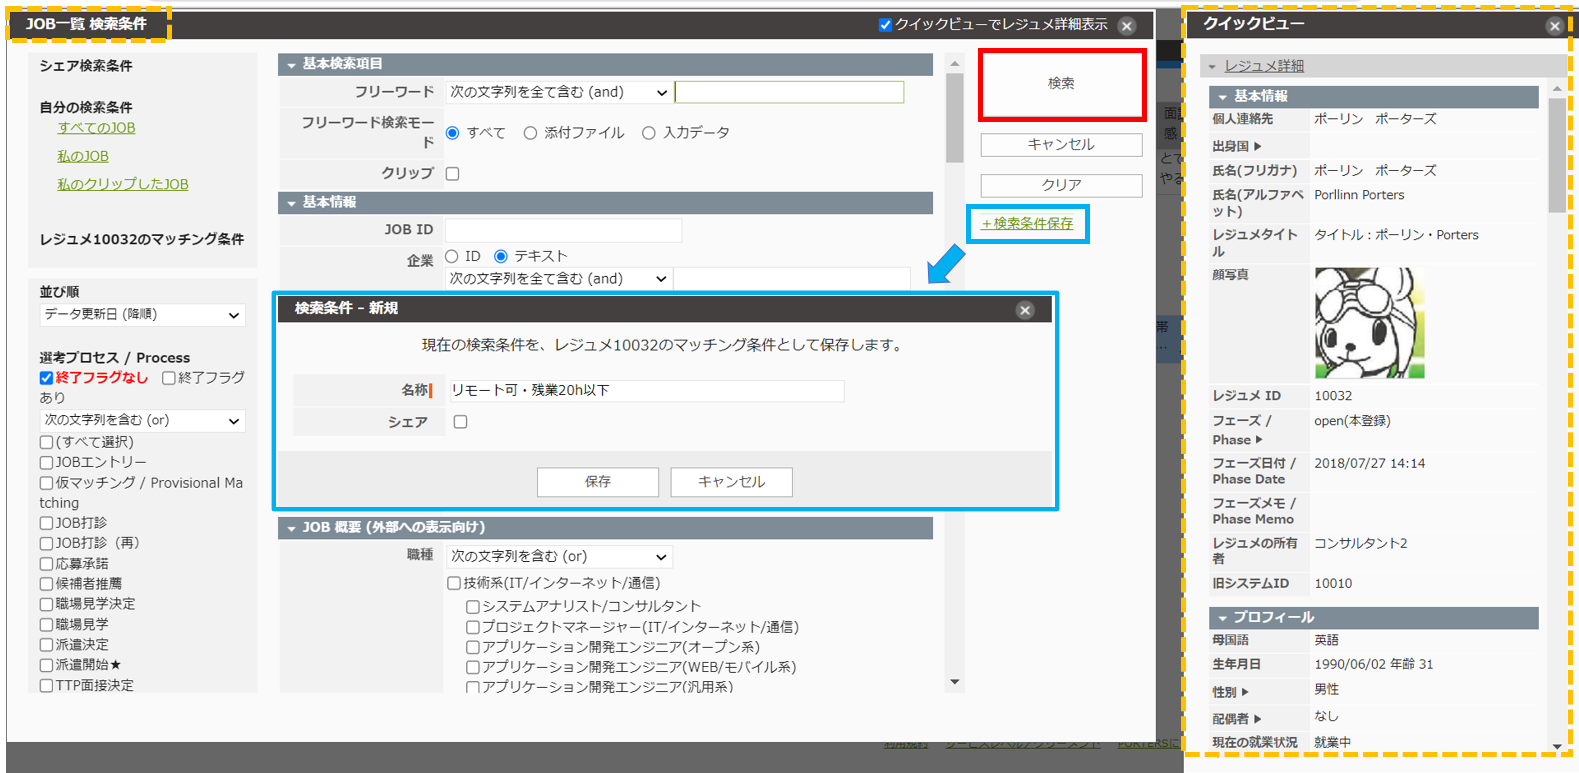
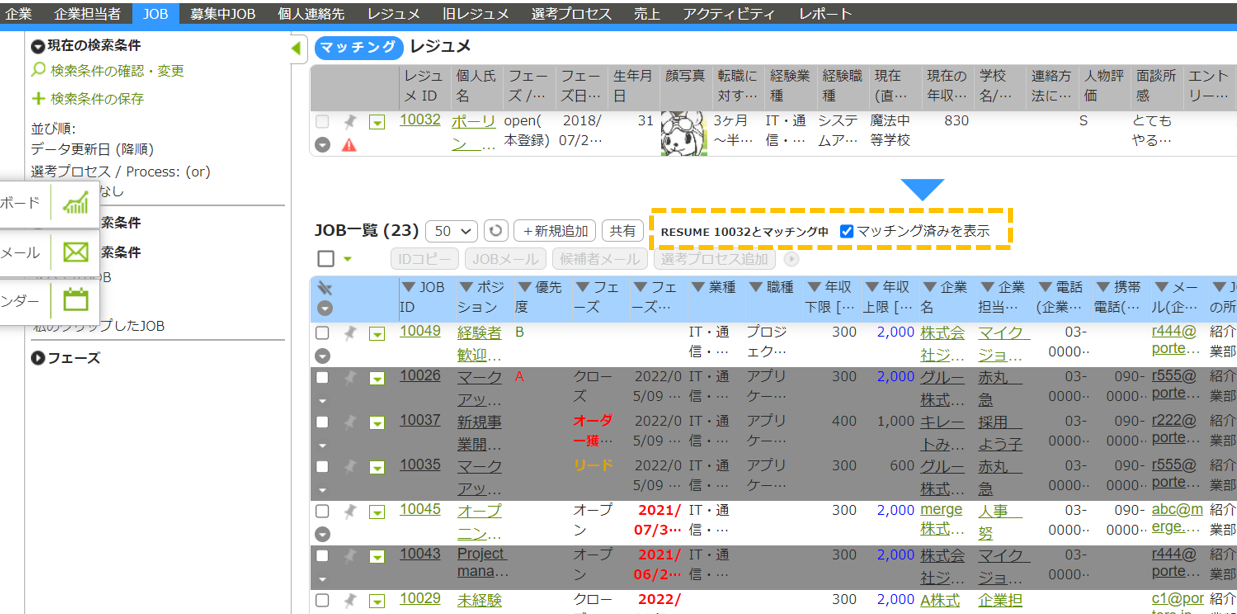
After executing a search, a separate tab will open with a list of matching result of JOBs.
At the top of the screen, the resume for which matching was performed will be displayed, and
below that, you will see a list of matching jobs with the notation, "Matching with RESUME XXXXX.
If you check the "Show Matched" checkbox, data that has already been created in the selection process will be grayed out on the screen.
Pattern 1 [Bulk Email Sending] Sending JOBs to candidates by email.
Check the JOBs you wish to introduce and click on "JOB Email". You can select up to 20 JOBs.
You can also select "All" or "Displayed data" from the ▼ button in the upper left corner.
※"All" will be all the results of the search. Please note that "All" includes data that is not displayed due to the "Show Matched" checkbox being unchecked, for example.
If you want to send the same email to another candidate, you can select up to 20 resumes as recipients. You can search by Resume ID or Name.
※If you select more than one recipient, you will not be able to create/update the selection process in the "Send Email" screen.
メール作成画面が開きますので、テンプレートの適用、宛先にチェックを入れるなど、必要な設定を行います。
送信内容の作成、各項目の設定が完了したら「送信」ボタンをクリックします。
※宛先にはメールアドレス型の項目名と、各項目に登録されているデータ件数が表示されますので、送信対象にする項目にチェックしてください。
※一括メール送信の場合、タグを適用している箇所はメール作成画面上はタグ表示{{ }}のままですが、実際にはHRBC内のデータが反映された状態でメールが送信されます。
※JOB blockが差し込まれた箇所は、データ内容が反映されて表示されます。
※宛先が複数の場合は、フェーズ更新設定はできません。
※各種詳細設定については一括メール送信、メールテンプレート作成/署名作成をご確認ください。
フェーズ更新設定をしている場合、していない場合でそれぞれメッセージが異なります。「Yes」をクリックします。
「OK」をクリックします。
一括メール送信が実行され、画面右上にアイコンが表示されます。
実行中はオレンジの点滅になり、処理が終わると緑色に変わります。
アイコンをクリックし、「一括メール送信結果ファイルをダウンロード」をクリックし、送信結果を確認します。
メール送信時に「フェーズの更新」を設定していた場合、メール送信と同時に選考プロセスが作成されます。
パターン②【個別メール送信】JOBを求職者宛にメールで送信する
マッチング結果のJOB一覧で、打診するJOBにチェックを入れ、「IDコピー」をクリックします。
レジュメのアクションメニュー「▼」ボタンから「JOBメール送信」をクリックします。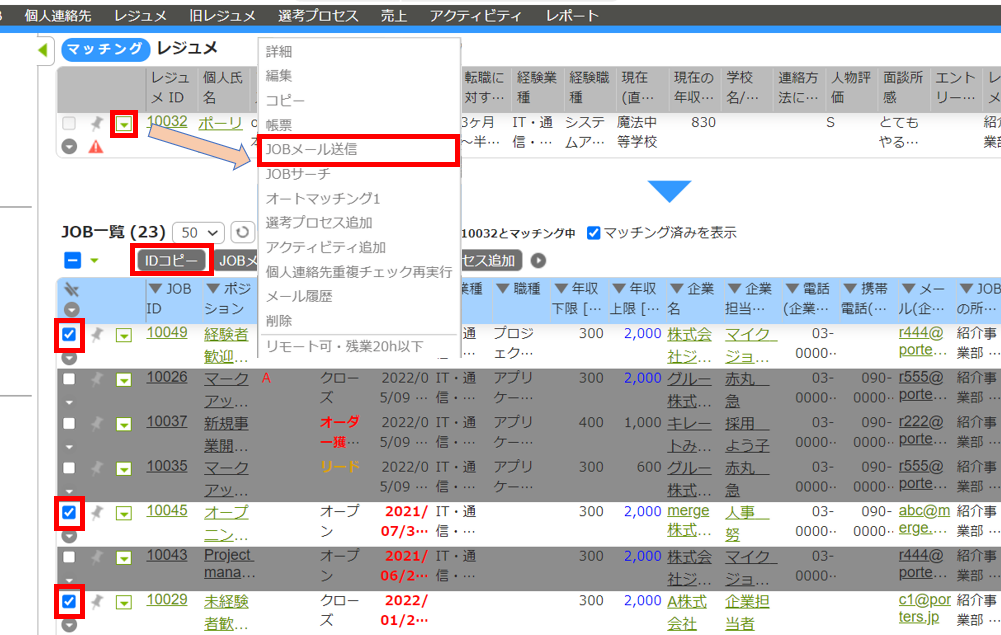
IDコピーしたJOBを貼り付けます。
JOBは20件まで選択できます。JOB ID 以外に、ポジション名、企業名で検索することも可能です。
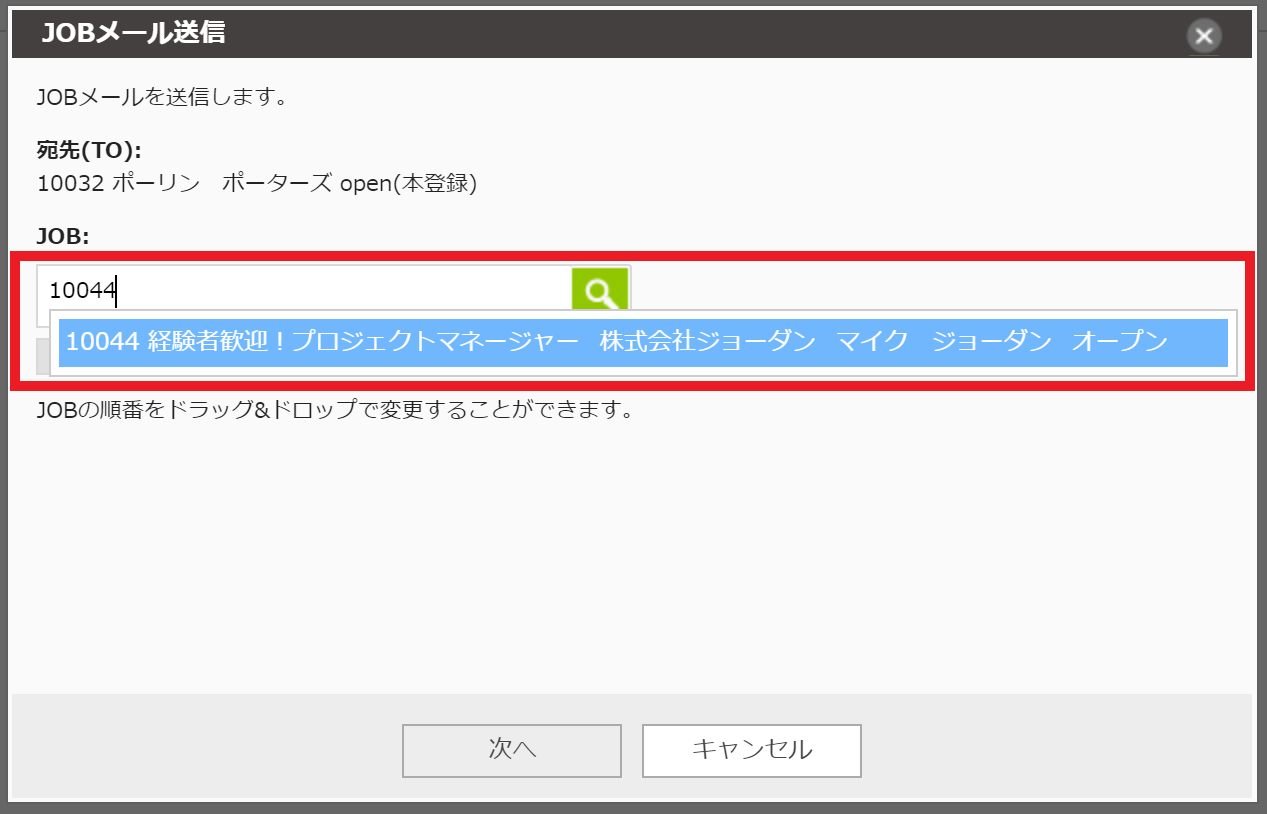
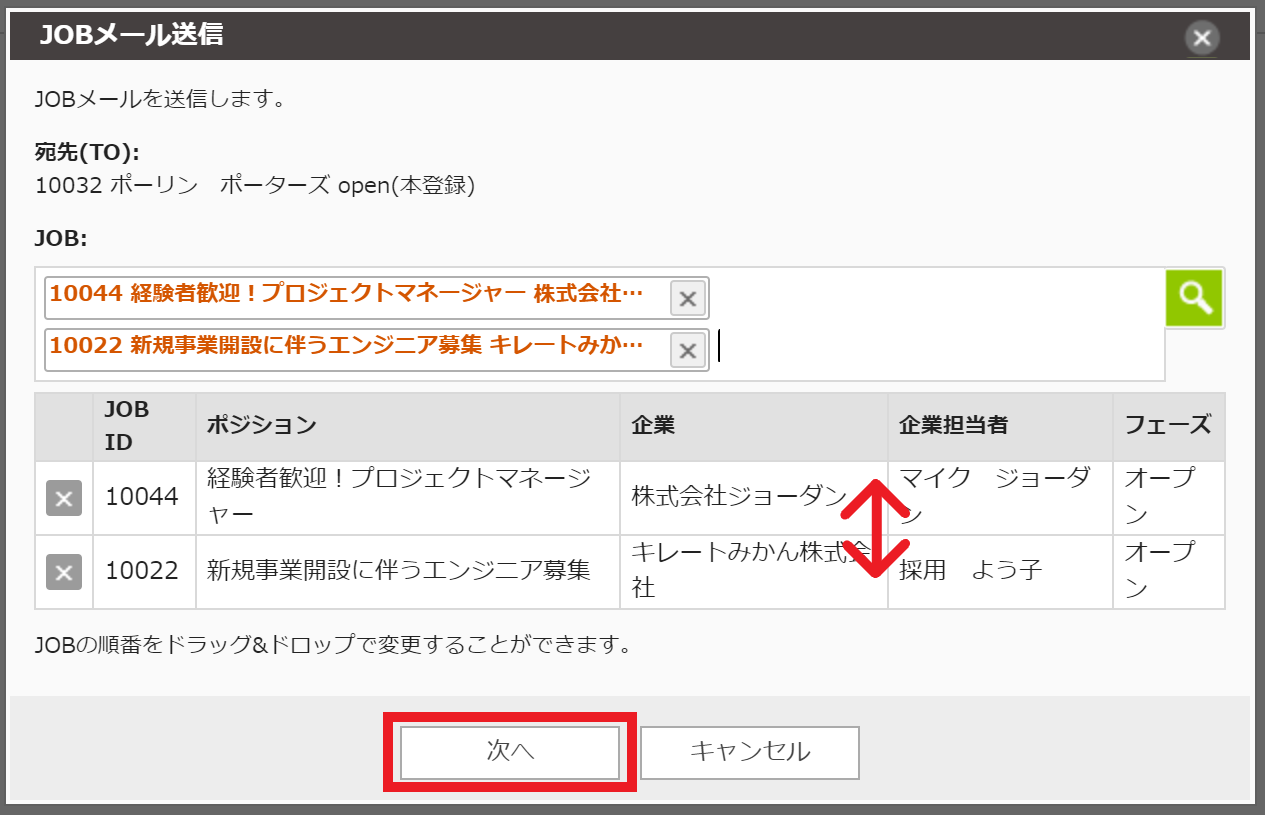
表示順を変更したい場合はドラッグ&ドロップで上下を入れ替えることができます。
設定ができたら「次へ」をクリックしてください。
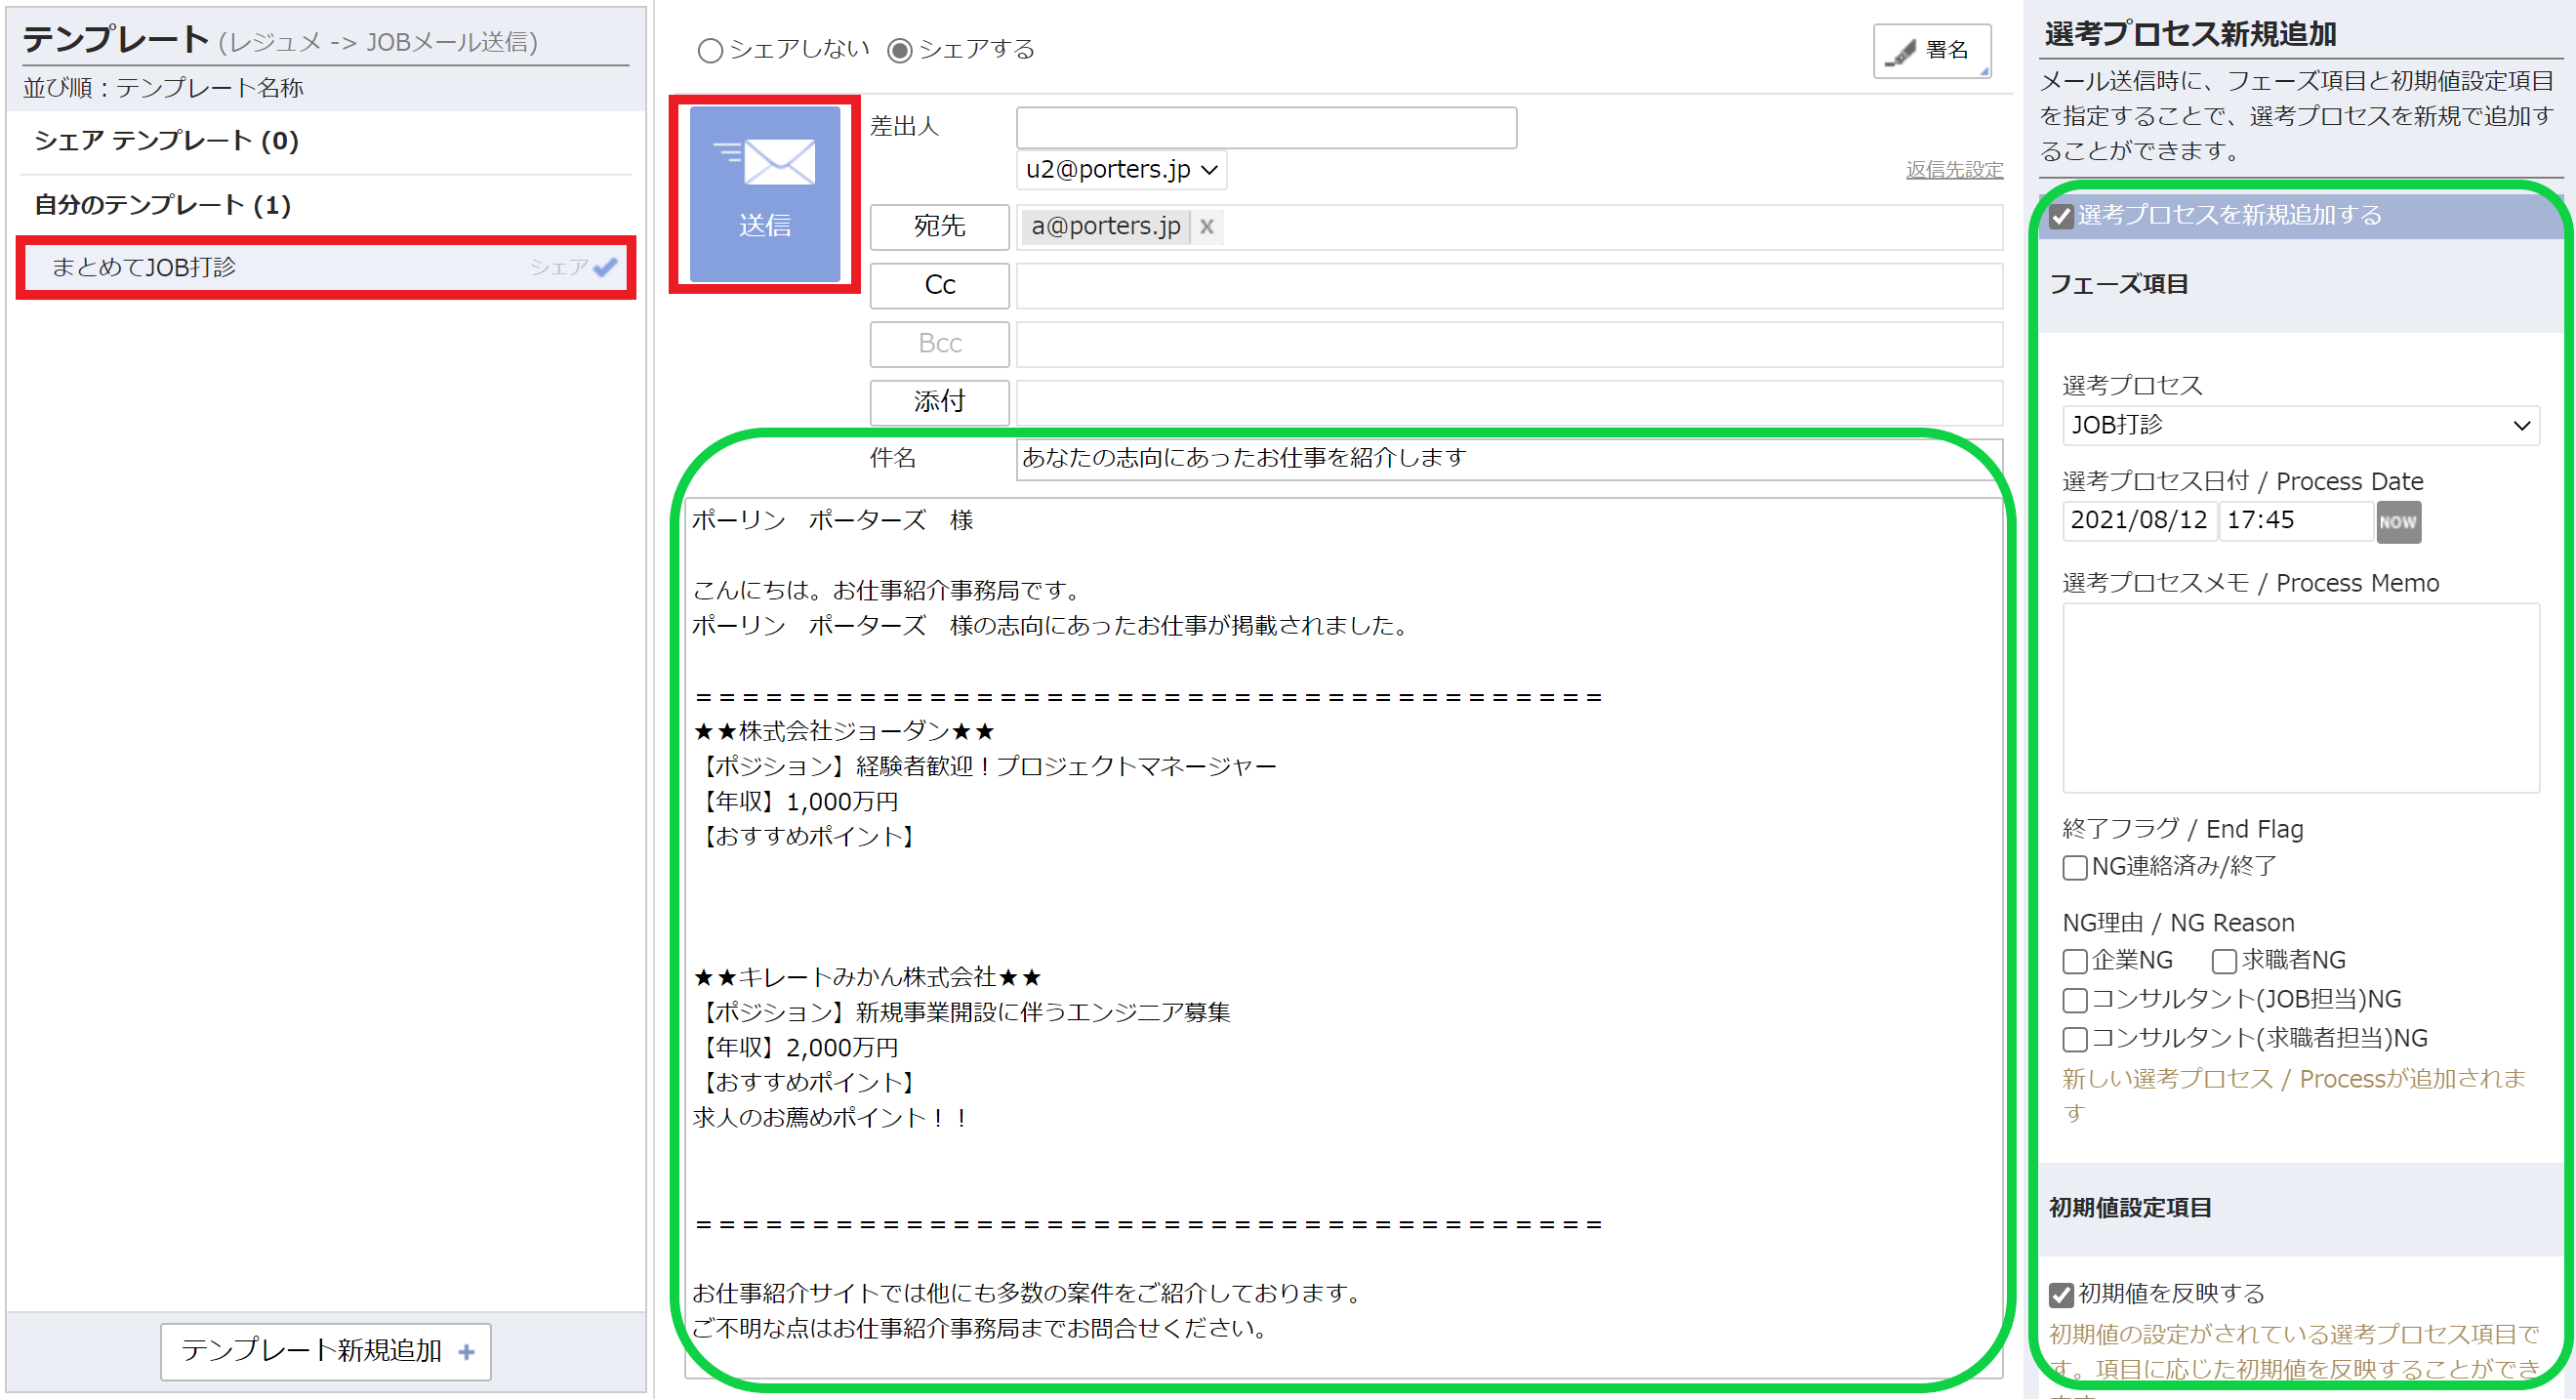
メール作成画面が開きますので、テンプレートの適用など、必要な設定を行います。
※各種詳細設定についてはメール送信、メールテンプレート作成/署名作成をご確認ください。
送信内容の作成、各項目の設定が完了したら「送信」ボタンをクリックします。
メッセージが表示されたら送信完了です。

メール送信時に「フェーズの更新」を設定していた場合、メール送信と同時に選考プロセスが作成されます。
パターン③ 【一括選考プロセス追加】を行う
打診するJOBが決まったら、メール送信はせず、「選考プロセス追加」のみを行うことも可能です。
複数のJOBに対して一括で選考プロセスを追加する場合、マッチング後のJOB一覧画面で該当のJOBにチェックを入れ、「選考プロセス追加」をクリックします。
左上の▼ボタンから、「全件」「表示されているデータ」を選択することもできます。
※「全件」は検索結果の全件が対象となります。「マッチング済みを表示」のチェックを外していると選考プロセスが作成されているJOBは表示されなせんが、表示されていないデータも対象となります。但し、実行しても「すでに選考プロセスが登録されています」というエラーになります。
レジュメとJOBが紐づけられていますので、「選考プロセス(最新)」項目などを入力し、「実行」をクリックします。
「Yes」をクリックします。
「OK」をクリックします。
一括選考プロセス作成が実行され、画面右上にアイコンが表示されます。
実行中はオレンジの点滅になり、処理が終わると緑色に変わります。
アイコンをクリックし、「一括作成結果を確認する」をクリックします。
処理結果を確認します。
パターン④ 【個別選考プロセス追加】を行う
打診するJOBが決まったら、メール送信はせず、「選考プロセス追加」のみを行うことも可能です。
1件のみ作成する場合、マッチング後のJOB一覧画面から、アクションメニュー「▼」ボタンの「選考プロセス追加」をクリックします。
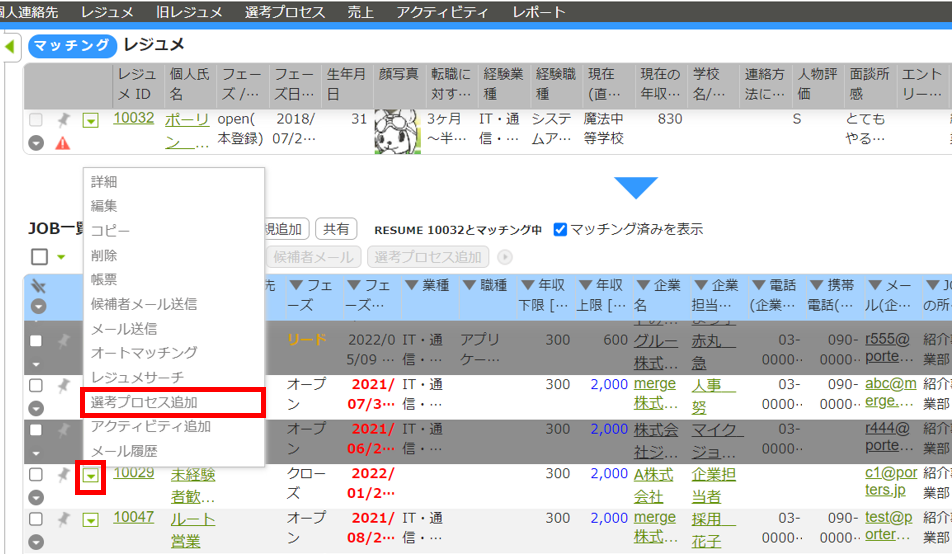
選考プロセス 新規追加画面が開きます。
JOBとレジュメが紐づいた状態になっているので、その他の項目を入力し、保存します。